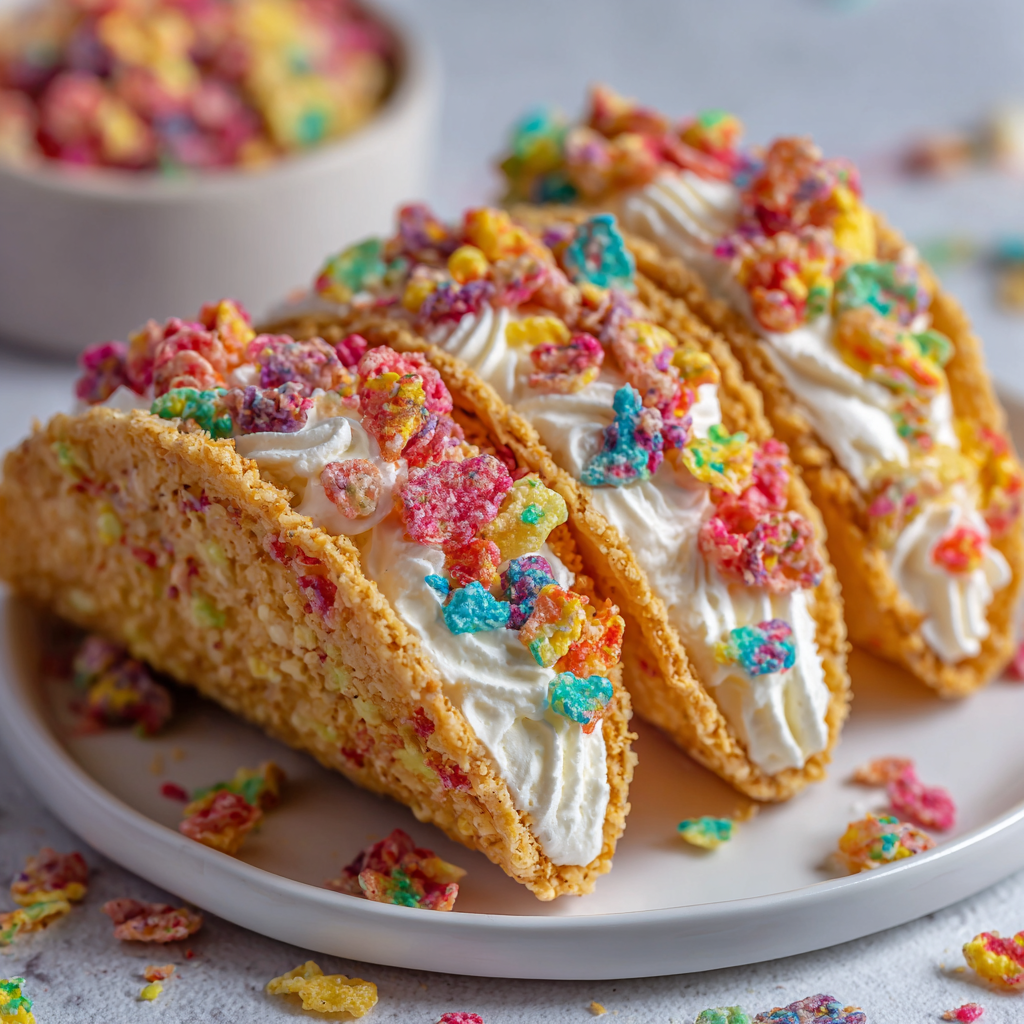
Fruity Pebbles Cheesecake Tacos
Crunchy cereal shells filled with fluffy cheesecake and finished with colorful cereal—Fruity Pebbles Cheesecake Tacos are a playful, nostalgic dessert that instantly grabs attention. They’re bright, fun, and perfect for parties, birthdays, or anytime you want a dessert that feels a little magical and totally unforgettable.
Introduction
Desserts are often about comfort, but sometimes they’re about fun. And these Fruity Pebbles Cheesecake Tacos deliver fun in every single bite. From their vibrant rainbow colors to their creamy cheesecake filling and crunchy cereal shells, this dessert is designed to spark joy the moment it hits the table.
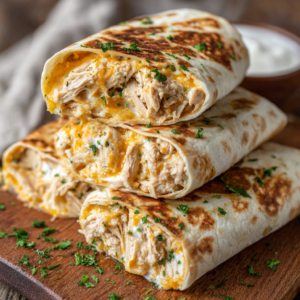
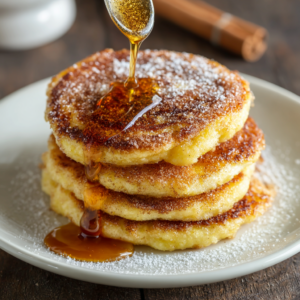
More breakfast ideas you’ll love
If you love creative desserts that combine nostalgic flavors with modern presentation, this recipe is for you. Inspired by classic no-bake cheesecake and childhood-favorite fruity cereal, these tacos blur the line between dessert and conversation piece. They’re whimsical enough for kids, indulgent enough for adults, and impressive enough to steal the spotlight at any gathering.
Unlike traditional cheesecake, these Fruity Pebbles Cheesecake Tacos don’t require baking, water baths, or long chilling times. The cereal shells are held together with melted butter, chilled into shape, and then filled with a light, airy cheesecake mixture that balances sweetness with creaminess. The final sprinkle of Fruity Pebbles on top adds crunch, color, and an extra pop of fruity flavor.
Whether you’re planning a birthday party, baby shower, holiday dessert table, or just want something different for a weekend treat, Fruity Pebbles Cheesecake Tacos are guaranteed to be a hit.
Why You’ll Love Fruity Pebbles Cheesecake Tacos
There are countless reasons why this recipe deserves a spot in your dessert rotation:
-
No-Bake Dessert: No oven required, making it perfect for warm weather or quick prep.
-
Visually Stunning: Bright colors instantly draw attention on dessert tables.
-
Fun & Nostalgic: Fruity Pebbles bring back childhood memories.
-
Customizable: Easily adapt with different cereals, fillings, or toppings.
-
Perfect for Parties: Individual servings make them easy to serve and eat.
-
Light Yet Indulgent: Creamy cheesecake filling without feeling overly heavy.
These Fruity Pebbles Cheesecake Tacos are proof that desserts don’t have to be complicated to be impressive.
Recipe Details
-
Prep Time: 20 minutes
-
Cook Time: 30 minutes (chilling time)
-
Total Time: 50 minutes
-
Yield: 6 servings
-
Category: Desserts
-
Cuisine: American
-
Difficulty: Intermediate
-
Dietary: Vegetarian
Ingredients
For the Cereal Shells
-
3 cups fruity cereal
-
½ cup unsalted butter, melted
For the Cheesecake Filling
-
8 oz cream cheese, softened to room temperature
-
½ cup powdered sugar, sifted
-
1 teaspoon pure vanilla extract
-
1 cup whipped cream
For Garnish
-
Additional fruity cereal
Ingredient Breakdown & Tips
Fruity Cereal
The star of these Fruity Pebbles Cheesecake Tacos. Fruity Pebbles work best because of their bright colors and light, crispy texture, but you can experiment with other fruity cereals if desired.
Unsalted Butter
Butter binds the cereal together and adds richness. Using unsalted butter allows better control over sweetness.
Cream Cheese
Full-fat cream cheese is essential for a rich, smooth cheesecake filling. Reduced-fat versions may result in a softer texture.
Powdered Sugar
Powdered sugar dissolves easily, keeping the filling silky smooth.
Whipped Cream
Folded in gently, whipped cream lightens the filling and creates that fluffy, mousse-like cheesecake texture.
Instructions
1. Make the Cereal Shells
In a large mixing bowl, combine the fruity cereal with the melted butter. Stir gently but thoroughly until every piece of cereal is evenly coated.
2. Shape and Chill
Press the cereal mixture firmly into taco-shaped molds or inverted muffin tins. Use your fingers or the back of a spoon to compact the cereal tightly—this step is crucial to prevent crumbling.
Place the molds in the refrigerator and chill for at least 30 minutes, or until the shells are firm and hold their shape.
3. Prepare the Cheesecake Filling
In a separate bowl, use a hand mixer to beat the softened cream cheese until smooth and fluffy. Gradually add the powdered sugar and vanilla extract, mixing until fully incorporated.
4. Fold in Whipped Cream
Using a spatula, gently fold the whipped cream into the cream cheese mixture. Take your time to keep the filling light and airy—overmixing can deflate it.
5. Fill the Shells
Once the cereal shells are firm, carefully remove them from the molds. Spoon or pipe the cheesecake filling generously into each shell.
6. Garnish and Serve
Sprinkle additional fruity cereal on top for extra crunch and color. Serve immediately for a softer filling, or chill briefly for a firmer texture.
Tips for Best Results
-
Press Firmly: Compact the cereal mixture tightly to create sturdy shells.
-
Use Room-Temperature Cream Cheese: Prevents lumps and ensures a smooth filling.
-
Fold Gently: Keep the filling fluffy by folding whipped cream carefully.
-
Assemble Close to Serving: Maintains maximum crunch in the cereal shells.
-
Use a Piping Bag: Makes filling the shells neat and effortless.
Variations on Fruity Pebbles Cheesecake Tacos
Chocolate Drizzle Version
Drizzle melted white or milk chocolate over the filled tacos for an extra layer of sweetness.
Mini Taco Bites
Use smaller molds to create bite-sized Fruity Pebbles Cheesecake Tacos—perfect for dessert platters.
Strawberry Cheesecake Tacos
Add strawberry extract or swirl strawberry sauce into the filling for fruity depth.
Birthday Cake Cheesecake Tacos
Mix rainbow sprinkles into the cheesecake filling for a party-ready twist.
Cereal Swap
Try Cocoa Pebbles, Cinnamon Toast Crunch, or even Rice Krispies for a new flavor profile.
Make-Ahead & Storage Tips
-
Make-Ahead: Prepare shells and filling separately up to 24 hours in advance.
-
Storage: Store assembled tacos in an airtight container in the refrigerator for up to 2 days.
-
Freezing: Not recommended—cereal shells may lose their crunch.
Serving Suggestions
-
Pair with fresh fruit for a balanced dessert platter.
-
Serve alongside ice cream for an indulgent dessert spread.
-
Display on a colorful tray for maximum visual impact at parties.
Fruity Pebbles Cheesecake Tacos
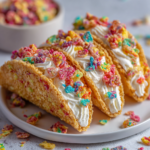
These Fruity Pebbles Cheesecake Tacos are a creative dessert twist that combines crunchy, buttery cereal shells with a light and creamy no-bake cheesecake filling. They’re colorful, fun to eat, and surprisingly simple to make. Perfect for birthdays, kids’ parties, or anytime you want a dessert that stands out and brings a little joy to the table.
Ingredients
For the Cereal Shells
-
3 cups fruity cereal
-
½ cup unsalted butter, melted
For the Cheesecake Filling
-
8 oz cream cheese, softened to room temperature
-
½ cup powdered sugar, sifted
-
1 teaspoon pure vanilla extract
-
1 cup whipped cream
For Garnish
-
Additional fruity cereal
Instructions
-
Make the cereal shells
In a mixing bowl, combine fruity cereal and melted butter. Stir until all cereal is evenly coated. -
Shape and chill
Press the mixture firmly into taco-shaped molds or inverted muffin tins. Compact tightly to help the shells hold their shape. Refrigerate for at least 30 minutes, or until firm. -
Prepare the cheesecake filling
Using a hand mixer, beat the cream cheese until smooth and fluffy. Gradually add powdered sugar and vanilla extract, mixing until fully combined. -
Fold in whipped cream
Gently fold the whipped cream into the cream cheese mixture using a spatula, keeping the filling light and airy. -
Fill the shells
Once the cereal shells are firm, carefully remove them from the molds. Spoon or pipe the cheesecake filling generously into each shell. -
Garnish and serve
Sprinkle extra fruity cereal on top. Serve immediately for a softer filling, or chill briefly for a firmer texture.
Notes
-
Press the cereal mixture very firmly into the molds to prevent crumbling.
-
Use full-fat cream cheese for the creamiest texture and best flavor.
-
Fold the whipped cream gently to keep the filling light and fluffy.
-
Assemble just before serving for maximum crunch.
-
For easier filling, use a piping bag or zip-top bag with the corner snipped.
Nutrition (Per Serving – Approximate)
-
Calories: 380 kcal
-
Carbohydrates: 38 g
-
Protein: 5 g
-
Fat: 24 g
-
Saturated Fat: 14 g
-
Sugar: 24 g
-
Fiber: 1 g
Frequently Asked Questions
Can I make Fruity Pebbles Cheesecake Tacos ahead of time?
Yes, but for best texture, assemble them close to serving time to keep the shells crunchy.
Can I use store-bought whipped topping?
Absolutely. Substitute whipped cream with whipped topping if preferred.
Are these tacos kid-friendly?
Very much so! Kids love the colors, crunch, and creamy filling.
Do I need special molds?
No—upside-down muffin tins work perfectly to shape the shells.
Why Fruity Pebbles Cheesecake Tacos Are Perfect for Parties
These Fruity Pebbles Cheesecake Tacos are more than a dessert—they’re an experience. Guests immediately gravitate toward their bright colors and unique shape. They’re easy to grab, mess-free, and instantly Instagram-worthy.
Because they’re individual servings, they eliminate the need for slicing or serving utensils. That makes them ideal for birthday parties, baby showers, potlucks, and holiday dessert tables.
Final Thoughts
Fruity Pebbles Cheesecake Tacos are the perfect example of how dessert can be both simple and spectacular. With crunchy cereal shells, fluffy no-bake cheesecake filling, and a colorful, nostalgic finish, they deliver on flavor, texture, and fun.
This recipe proves that you don’t need complicated techniques or fancy equipment to create a show-stopping dessert. Whether you’re making them for kids, guests, or just yourself, these tacos are guaranteed to bring smiles and spark conversations.