The Ultimate Guide to Easy Homemade Biscuits: Flaky, Buttery Perfection in Under 30 Minutes
There’s a special kind of magic that happens in a kitchen when the aroma of baking Easy Homemade Biscuits begins to float through the air. That warm, buttery, slightly floury scent promises comfort, simplicity, and sheer deliciousness. In a world of complicated recipes and artisan breads that require days of preparation, the humble biscuit stands as a triumphant testament to the power of a few basic ingredients, handled with care. The quest for the perfect Easy Homemade Biscuit—tall, flaky, tender on the inside with a golden, crisp exterior—can feel elusive. But what if I told you that bakery-quality biscuits are not only achievable but are also shockingly simple to make?
This comprehensive guide is dedicated to demystifying the process. We’re going beyond the basic recipe to explore the why behind every step, ensuring your journey to biscuit mastery is a successful and delicious one. Whether you’re a seasoned baker or a nervous beginner, this post will equip you with all the knowledge, tips, and tricks you need to create a batch of spectacular Easy Homemade Biscuits that will become a staple in your culinary repertoire.
More breakfast ideas you’ll love
Why Easy Homemade Biscuits Are a Kitchen Essential
Before we dive into the flour, let’s talk about why this recipe is a game-changer. Easy Homemade Biscuits are the ultimate versatile quick bread. They require no yeast, no proofing time, and come together in minutes. They are:
-
The Perfect Blank Canvas: Equally happy smothered in sausage gravy, dripping with honey, or sandwiching a piece of fried chicken.
-
A Crowd-Pleaser: Few things are as universally loved as a warm biscuit served straight from the oven.
-
A Confidence Builder: Mastering biscuits teaches fundamental baking techniques like cutting in fat and handling dough with a light touch.
-
Economical & Accessible: Made with pantry staples you likely already have.
Deconstructing the Ingredients: The Science of Simplicity
The beauty of Easy Homemade Biscuits lies in their short ingredient list. Each component plays a critical role in the final texture and flavor.
-
All-Purpose Flour: The structural backbone. We use all-purpose for its moderate protein content (typically 10-12%), which provides enough gluten to give structure but not so much that it makes the biscuits tough. For an even more tender bite, some bakers swear by using a soft wheat flour like White Lily, but all-purpose works beautifully.
-
Baking Powder (Aluminum-Free): This is the primary leavening agent, the magic that makes the biscuits rise. When combined with liquid and heat, it produces carbon dioxide bubbles, causing the dough to expand. Using an aluminum-free variety ensures no metallic aftertaste. The amount is non-negotiable for that lofty rise.
-
Granulated Sugar: Just a teaspoon! Its role is twofold: it adds a subtle hint of sweetness that balances the salt and enhances browning, and it feeds the baking powder for a more consistent reaction.
-
Salt (Fine Sea Salt): The flavor enhancer. Salt is crucial in balancing the richness of the butter and bringing out the flour’s natural taste. Without it, biscuits taste flat.
-
Unsalted Butter, Cold: The undisputed star of the show. Cold butter is the secret to flakiness. As the biscuits bake, the solid pieces of butter melt, releasing steam and creating pockets. This steam pushes the layers of dough apart, resulting in those sought-after, delicate layers. Using unsalted butter allows you to control the exact salt level.
-
Half-and-Half: The liquid binder. Half-and-half (a blend of milk and cream) provides richness and tenderness. The fat in the half-and-half coats the flour proteins, inhibiting gluten development. The liquid also activates the baking powder. The slight reduction (1 cup minus 2 tbsp) accounts for variables in flour absorption, preventing a wet dough.
The Art of the Technique: A Step-by-Step Masterclass
Creating perfect Easy Homemade Biscuits is about technique as much as ingredients. Let’s walk through the process with a focus on the critical details.
Step 1: The Mise en Place & Dry Mix
Success starts with preparation. Cube your butter and return it to the refrigerator. Preheat your oven to a hot 450°F (230°C). This blast of heat is essential for maximum oven spring (the rapid initial rise). In a large bowl, whisk the flour, baking powder, sugar, and salt thoroughly. Whisking, rather than sifting, ensures the leavening is evenly distributed, preventing bitter spots and ensuring an even rise.
Step 2: Cutting in the Cold Fat
Add the ice-cold butter cubes to the dry ingredients. Using a pastry blender, two knives, or even your fingertips (work quickly so the butter doesn’t melt), cut the butter into the flour. Your goal is a mixture resembling coarse crumbs with visible pea-sized and even a few larger almond-sized pieces of butter. Those larger chunks are your future flaky layers. Do not aim for a uniform, sandy texture—the variation is key.
Step 3: The Lightest Touch with Liquid
Make a well in the center of your flour-butter mixture. Pour in the cold half-and-half all at once. Using a sturdy fork or a silicone spatula, gently stir just until the dough is hydrated and begins to come together. It will look shaggy and messy, and there will still be dry flour at the bottom of the bowl. This is perfect. The number one mistake here is overmixing. Overworking the dough develops gluten, leading to tough, dense biscuits.
Step 4: The Turn & Fold (The Layer Creator)
Turn the shaggy dough out onto a lightly floured surface. With floured hands, gently pat (do not roll with a pin) the dough into a rough rectangle, about 1/2 inch thick. Using a bench scraper or your hands, fold the rectangle in half as if folding a letter. Pat it down gently again. Repeat this fold 1-2 more times. This process, called laminating, creates distinct, separate layers. After the final fold, pat the dough into a final rectangle about 3/4-inch thick.
Step 5: The Clean Cut
Dip a 2.5-inch round biscuit cutter in flour. Press it straight down into the dough—DO NOT TWIST. Twisting seals the edges of the dough, inhibiting the biscuits’ ability to rise straight up. Cut out as many biscuits as you can, placing them close together (about 1 inch apart) on a parchment-lined baking sheet. For softer sides, place them touching; for crisper sides, give them more space. Gently press the scraps together to cut the remaining biscuits, knowing they may be slightly less layered but will still be delicious.
Step 6: The Hot Bake & Buttery Finish
Bake on the center rack for 12-15 minutes. Watch for golden brown tops and bottoms. As soon as they come out of the oven, brush the tops generously with melted butter. This adds flavor, gives a beautiful sheen, and keeps the tops soft. Let them cool on the sheet for just a few minutes before devouring.
The Ultimate Guide to Easy Homemade Biscuits: Flaky, Buttery Perfection in Under 30 Minutes

These homemade biscuits are buttery, fluffy, and quick to make—perfect for breakfast, brunch, or as a side for any meal. With just six simple ingredients and no yeast, you can have soft, layered biscuits ready in under 30 minutes!
Ingredients
-
2 cups all-purpose flour
-
1 ½ tbsp baking powder (aluminum-free)
-
1 tsp granulated sugar
-
¾ tsp salt (fine sea salt works best)
-
½ cup unsalted butter, cold (cut into ½-inch cubes)
-
1 cup half-and-half (minus 2 tbsp)
-
½ tbsp melted butter, for brushing
Instructions
1. Prepare the Dough
-
Dice butter into ½-inch cubes and refrigerate until ready.
-
In a large mixing bowl, whisk together flour, baking powder, sugar, and salt.
-
Add cold butter and cut into the flour with a pastry blender (or two knives/fork) until pea-sized pieces remain.
-
Pour in 1 cup minus 2 tbsp of half-and-half all at once. Stir just until the dough comes together. Do not overmix.
2. Fold and Cut Biscuits
-
Turn dough onto a floured surface. Lightly flour the top if sticky.
-
Pat into a rectangle, fold in half, and pat again. Repeat once more.
-
Pat into a 5×10″ rectangle, about ¾″ thick.
-
Using a 2 ½″ round biscuit cutter, cut 8 biscuits. Gather scraps and cut 2 more biscuits.
3. Bake
-
Place biscuits 1 inch apart on a parchment-lined baking sheet.
-
Bake at 450°F (230°C) for 12–15 minutes, until golden brown.
-
Brush hot biscuits with ½ tbsp melted butter. Transfer to a wire rack to cool 10 minutes, then serve.
Notes
-
Use cold butter straight from the fridge to create flaky layers.
-
Cut straight down when using a biscuit cutter—don’t twist or saw, for a better rise.
-
Don’t overmix once the liquid is added; the dough should just come together.
-
Fold the dough 2–3 times before cutting to create extra layers.
-
Brush hot biscuits with melted butter for a golden, flavorful finish.
Pro Tips & Troubleshooting for Biscuit Brilliance
-
Freezer Trick: For ultimate flakiness, freeze your butter for 15 minutes before cubing, or even grate frozen butter on a box grater for effortless incorporation.
-
Buttermilk Swap: For a classic tangy flavor, substitute the half-and-half with 1 cup of cold buttermilk. The acidity reacts with the baking powder for a tender crumb.
-
No Cutter? No Problem: Use a sharp knife to cut the dough into squares. This eliminates scraps and is the traditional method for Southern “buttermilk biscuits.”
-
My Biscuits Didn’t Rise High: Likely culprits are old baking powder, overworked dough, twisting the cutter, or an oven that wasn’t hot enough.
-
My Biscuits Are Tough: This is almost always due to overmixing the dough after adding the liquid. Remember, shaggy is good!
-
Can I Make Them Ahead? Absolutely! You can cut the biscuits, place them on a baking sheet, cover, and refrigerate overnight. Bake straight from the fridge, adding a minute or two to the bake time. You can also freeze the unbaked, cut biscuits on a sheet, then transfer to a bag. Bake from frozen, adding 3-5 minutes.
Serving Suggestions: From Breakfast to Dinner
Your warm, fresh Easy Homemade Biscuits are a masterpiece ready to be enjoyed.
-
The Classic: Split and slather with good butter and high-quality honey or your favorite jam.
-
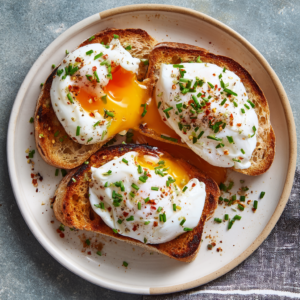
The Breakfast Sandwich: The ultimate vehicle for a fried egg, crispy bacon, and a slice of sharp cheddar.
-
Southern Comfort: Drowned in a creamy, peppery sausage gravy for biscuits and gravy.
-
Shortcake Style: Split and topped with macerated strawberries and freshly whipped cream.
-
Savory Side: The perfect accompaniment to soups, stews, and roasted chicken. Substitute shredded cheddar cheese and herbs into the dry mix for a flavor boost.
Storage and Reheating for Lasting Freshness
-
Room Temperature: Store in an airtight container for up to 2 days.
-
Refrigerator: They will keep for up to a week, well-wrapped.
-
Freezer: Freeze baked biscuits in a single layer, then bag for up to 3 months.
-
Reheating Magic: To recapture that just-baked quality, reheat biscuits in a 350°F oven for 5-10 minutes, or until warm. You can also wrap them in foil first to steam them slightly. Avoid the microwave, as it makes them gummy.
Final Thoughts
The journey to perfect Easy Homemade Biscuits is a delightful lesson in the beauty of simplicity and the importance of technique in baking. It reminds us that the most satisfying culinary creations often come not from a long list of exotic ingredients, but from a deep understanding and respectful handling of a few fundamental ones. The process—cutting cold butter into flour, gently folding the shaggy dough, witnessing the dramatic rise in a hot oven—is almost as rewarding as biting into that final, steaming, flaky layer.
This recipe is more than a set of instructions; it’s a foundation. Once you’ve mastered these classic Easy Homemade Biscuits, a world of variations opens up. Add fresh herbs and garlic powder for a dinner roll twist, fold in grated cheese and jalapeños, or sprinkle the tops with everything bagel seasoning. The humble biscuit is your canvas.
So, preheat your oven, grab your flour, and embrace the simple, profound joy of baking. With this guide in hand, you are more than equipped to bring the warm, comforting, and irresistibly delicious tradition of Easy Homemade Biscuits to your table anytime the craving strikes. Happy baking!